
Overview
This guide takes you through a first import from start to finish. Each step links to a detailed guide when you need more depth.
Before you start
- Make sure a Studio administrator has granted your work email access to the intended HubSpot portal.
- Have a CSV or XLSX export ready. Know which worksheet and row contain the column headings.
- Decide whether you need companies, contacts, notes or event participation.
- Agree which existing HubSpot values may be updated and which must be preserved.
- Check whether the import should create new records, update existing ones, or both.
Step 1: Sign in and choose the portal
Open imports.furball.tech and sign in with your Microsoft work account. If no portal is selected, choose one from Choose an account, searching by name, domain or portal ID.
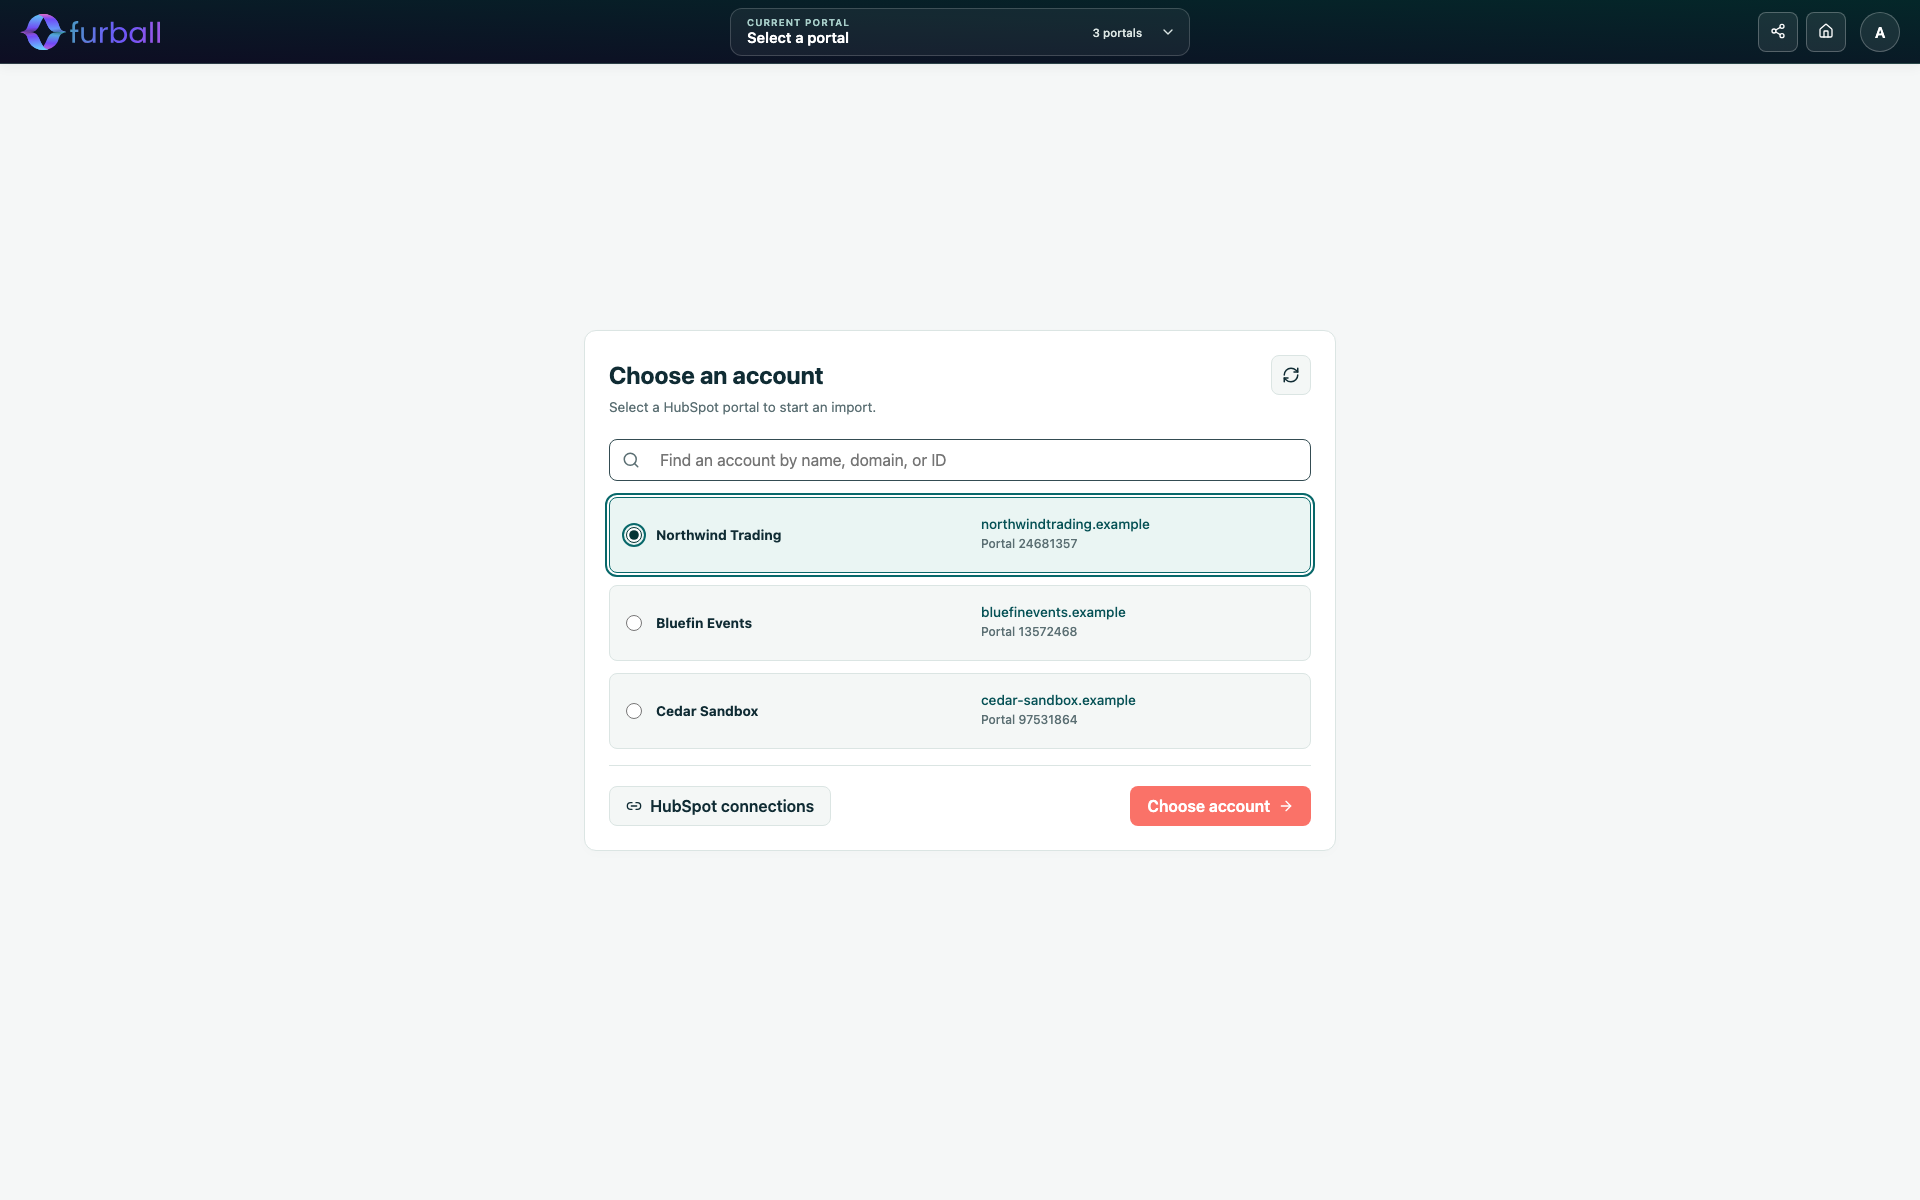
The selected portal appears under Current portal at the top of the page. Check its name and ID before you upload anything.
Step 2: Upload the file
On Home, drag a file into New import or click to browse. For a workbook, choose the worksheet. Then:
- Select the row that contains the headings and choose Use as header.
- Skip any introductory, summary or test rows.
- Check the columns that were skipped automatically because they contain no values.
- Give the import a clear name. It is prefilled from the file name and becomes the base of the download file names.
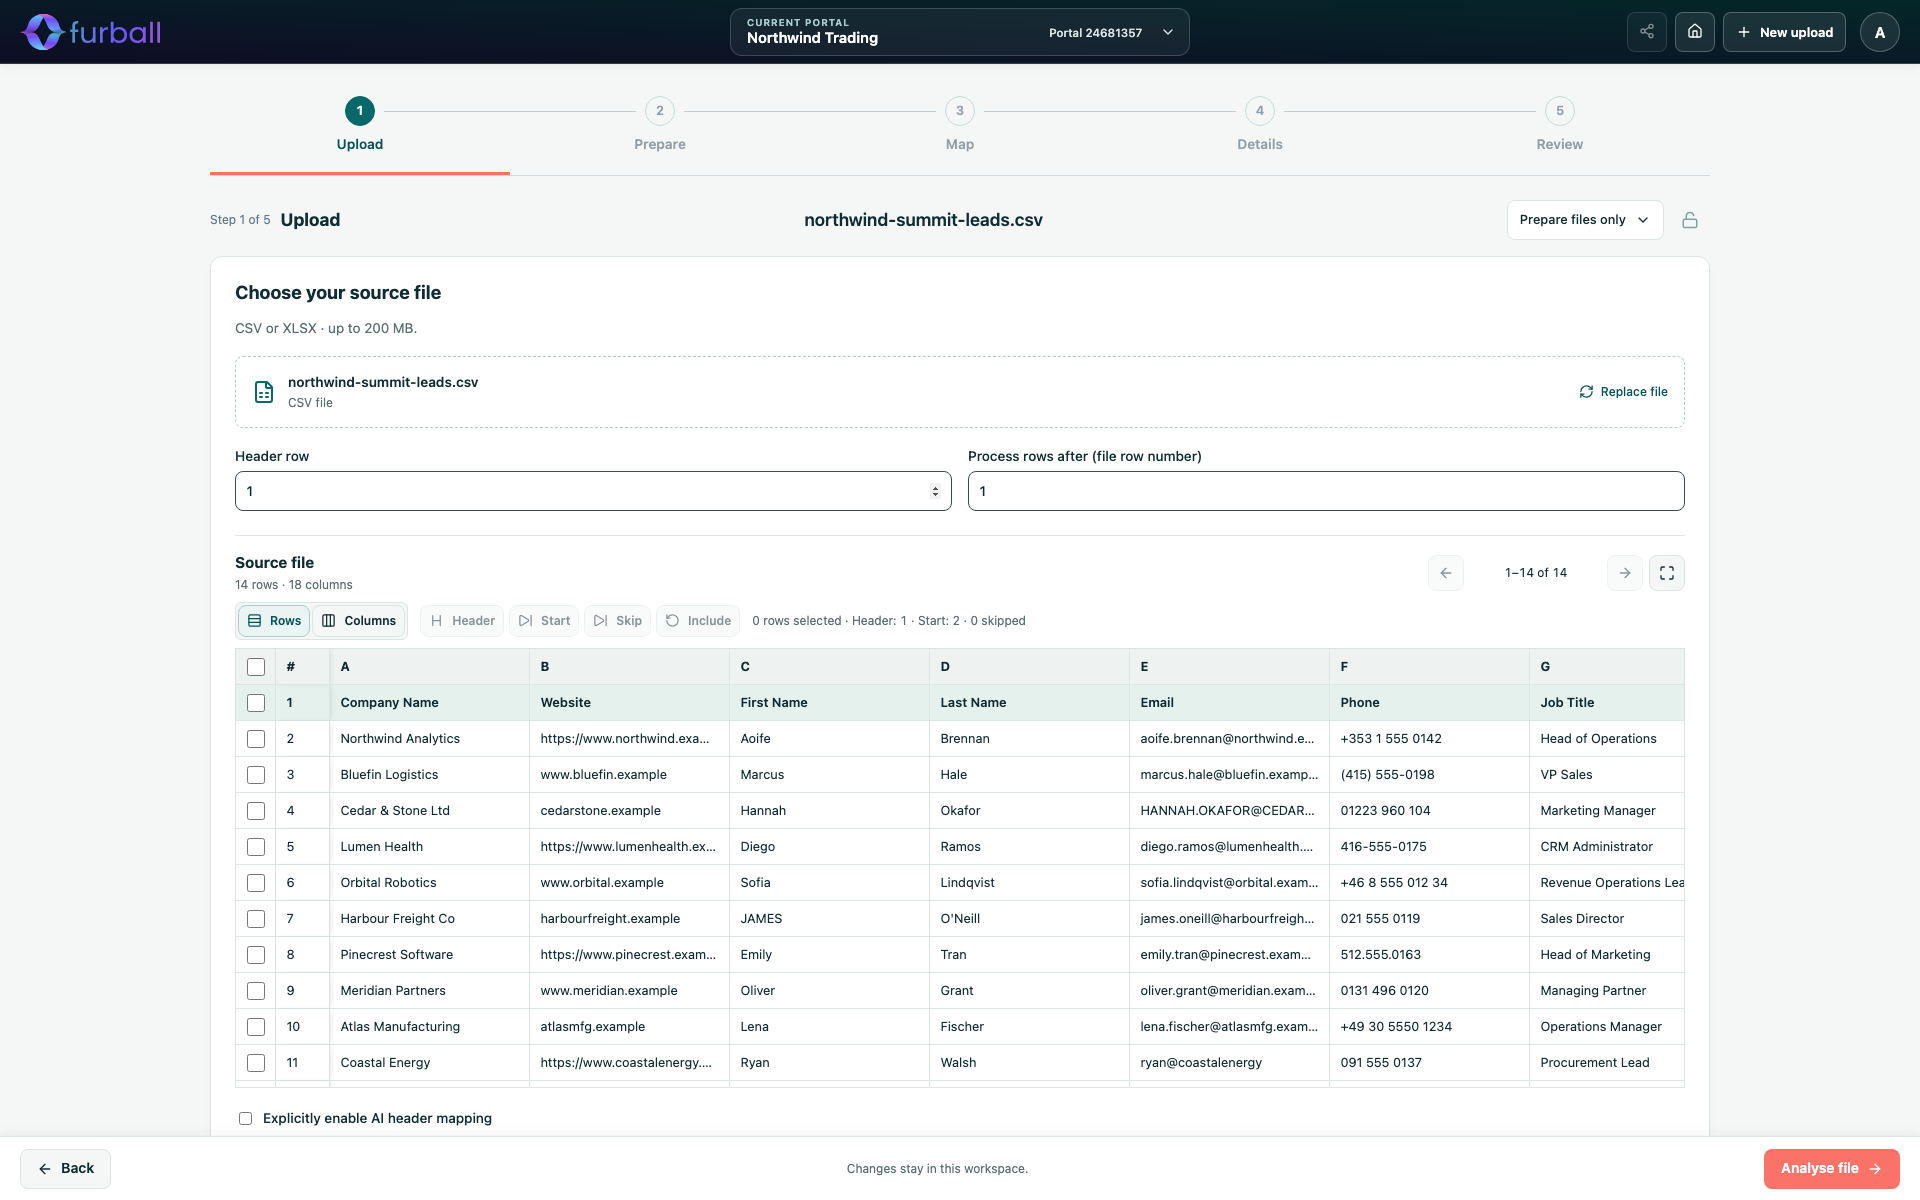
See Upload a File and Choose the Data to Process.
Step 3: Prepare columns
In Prepare, review each column's detected type, sample values, blanks and duplicates. Apply the clean-ups the data needs, such as trimming whitespace, replacing values or filling blanks, then choose Apply preparation to refresh the preview.
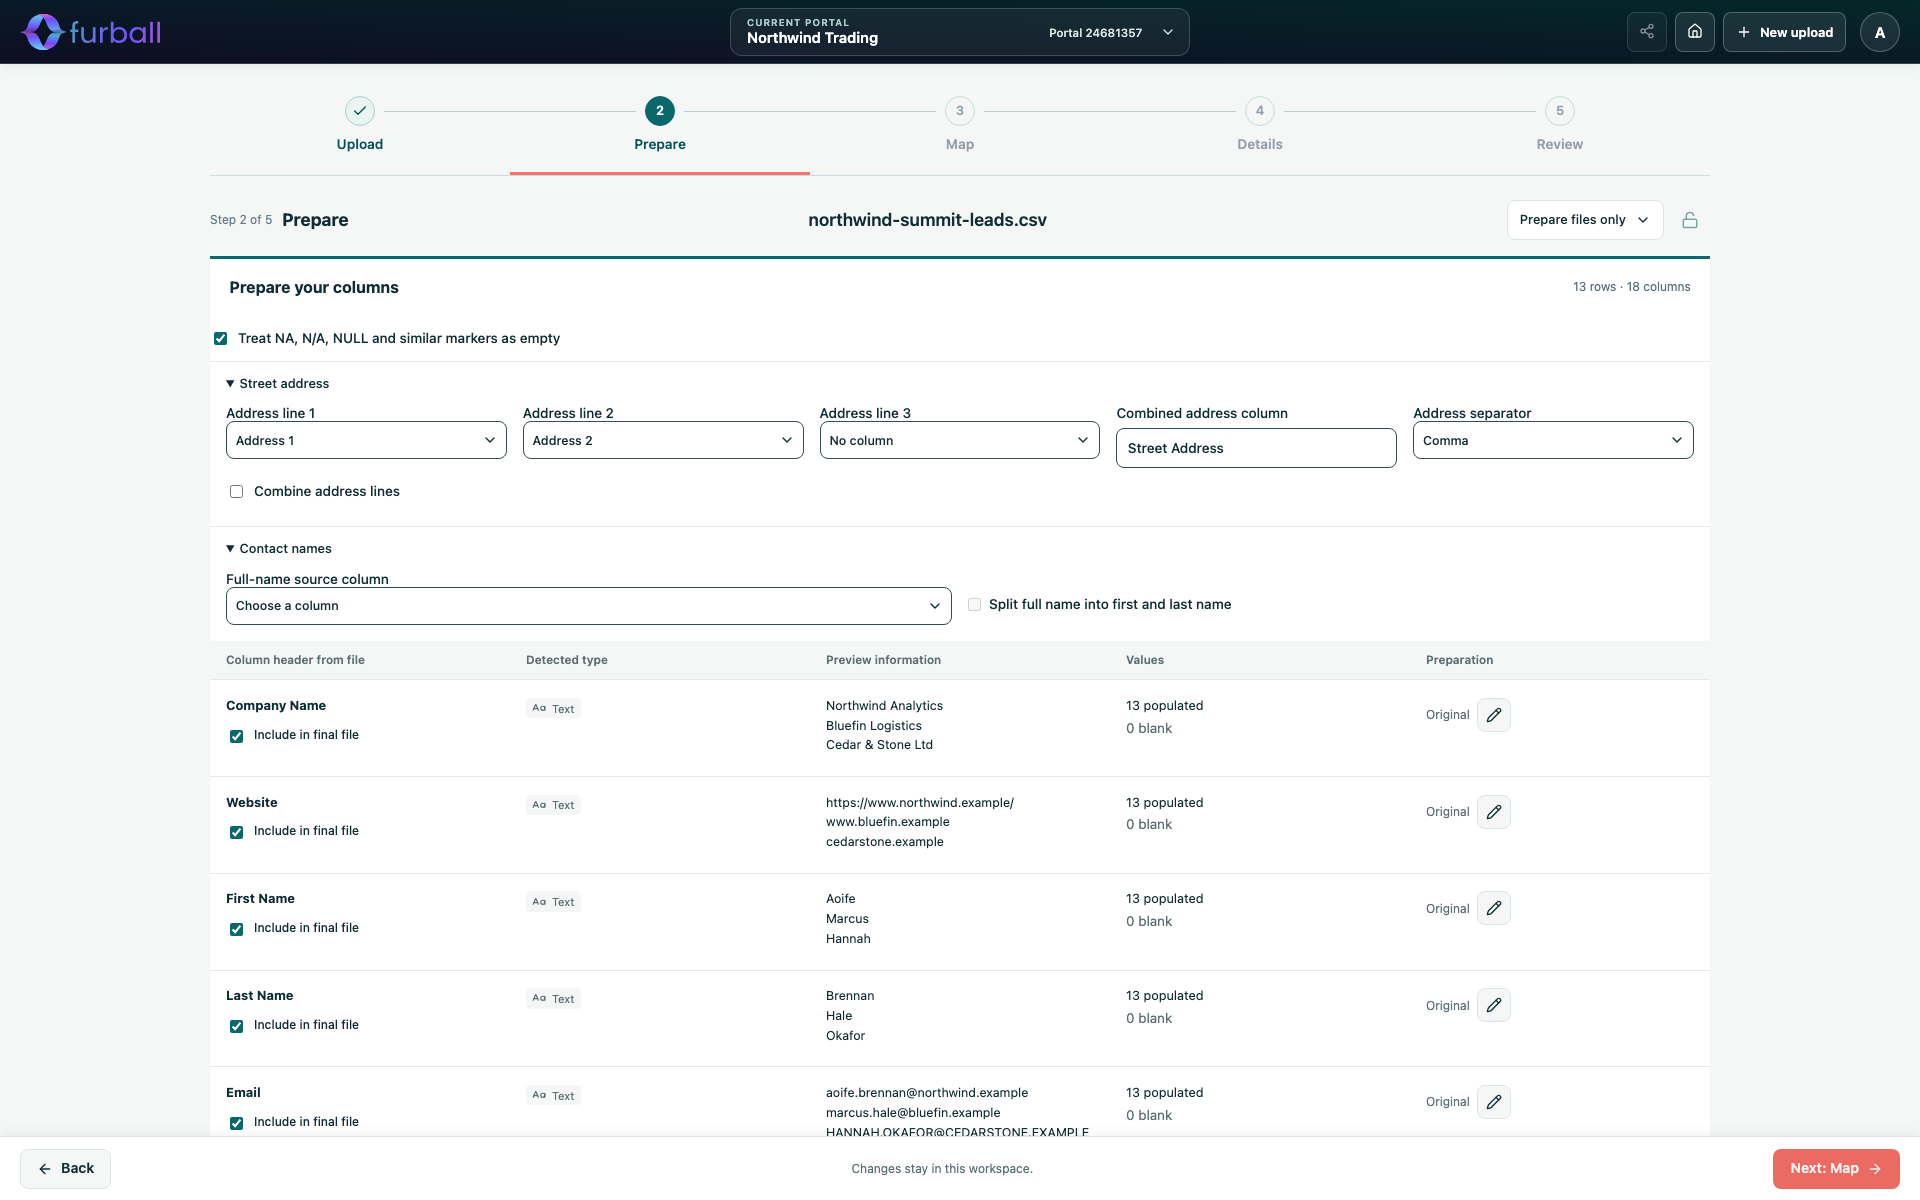
See Clean and Prepare Source Columns and Combine Addresses, Split Names and Prepare Emails.
Step 4: Map properties
In Map, confirm the HubSpot property for each column. Add a second property when one column should populate more than one object, such as a company name used for both companies and contacts. Review dropdown values and mark any properties whose existing values must not be overwritten.
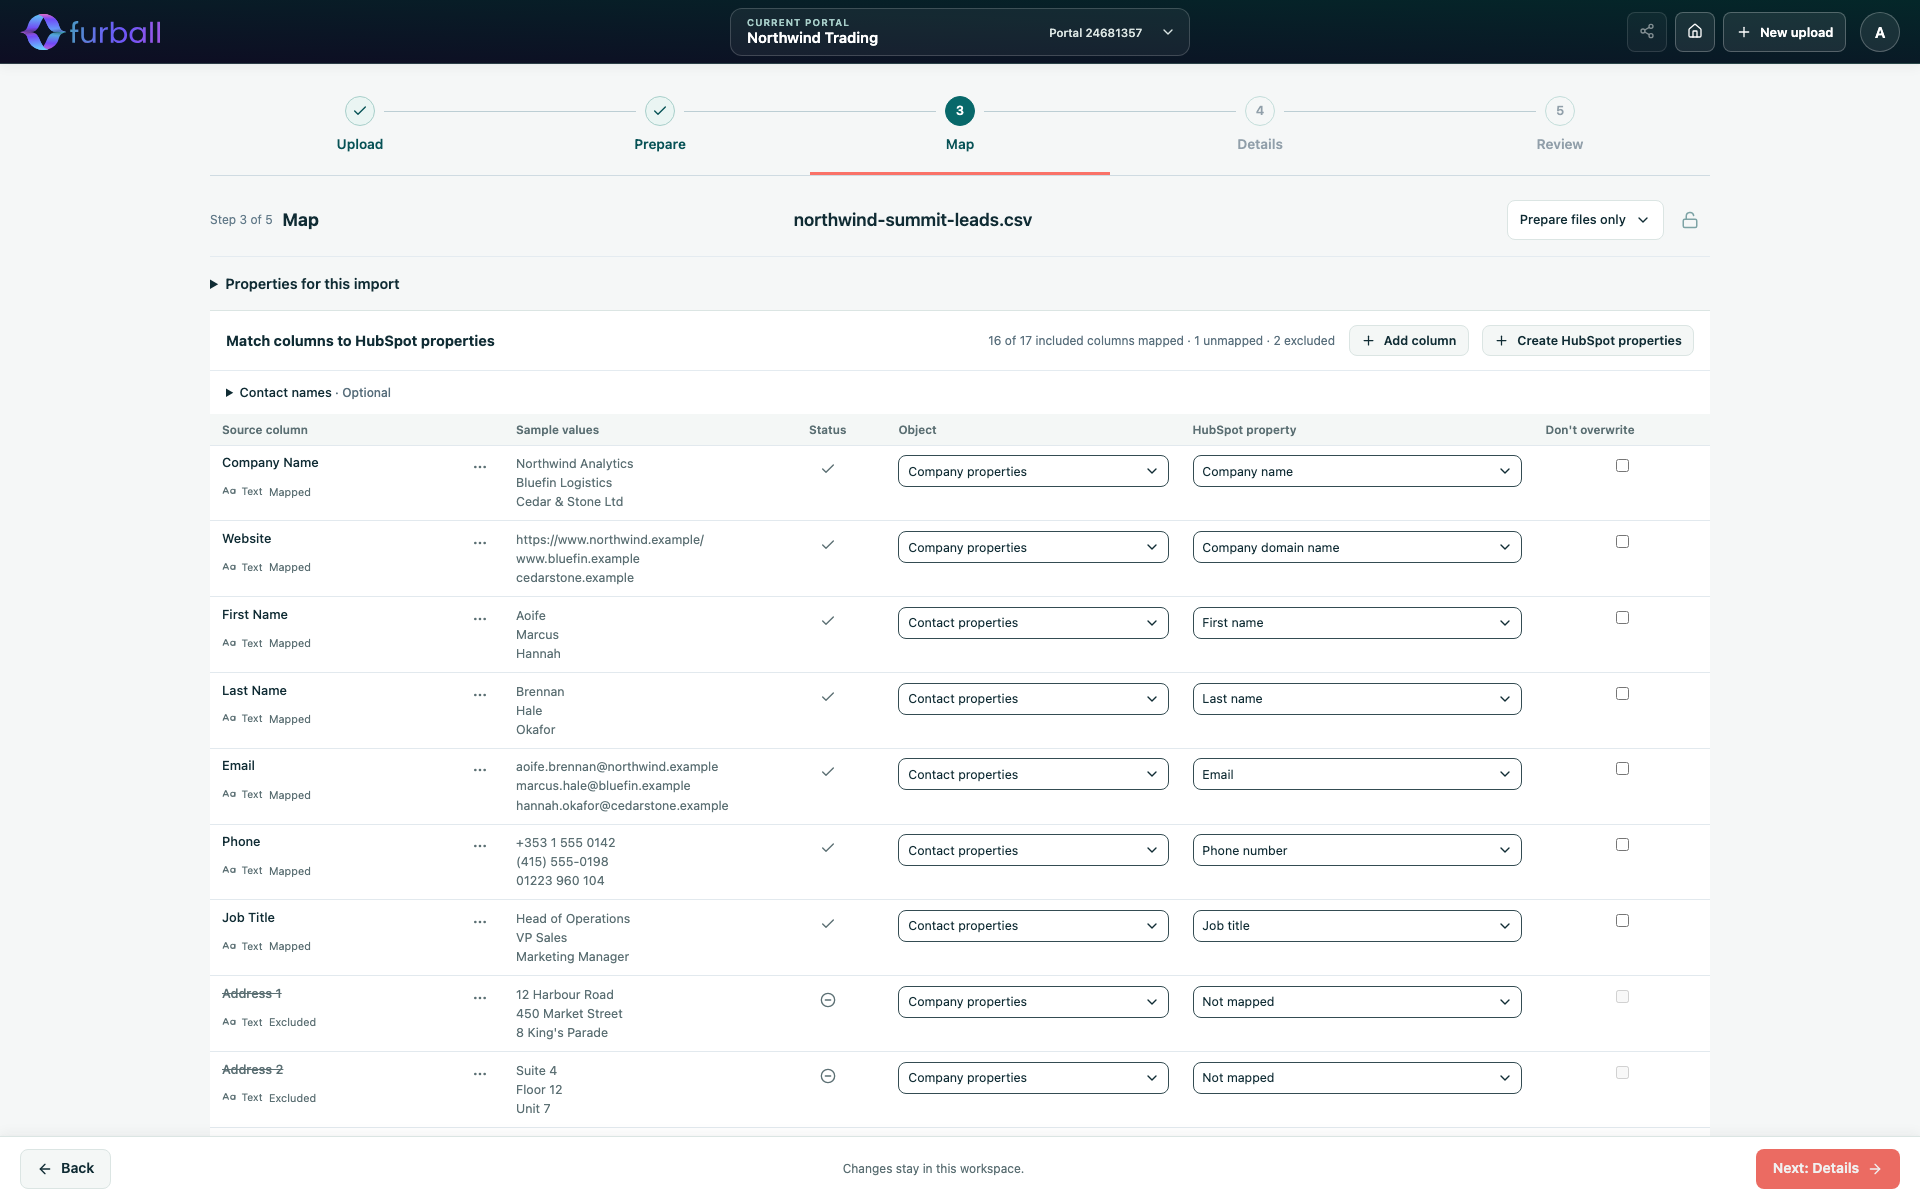
See Map Columns to HubSpot Properties and Review Dropdown, Checkbox and Owner Values.
Step 5: Configure details
In Details, choose the outputs and the create or update mode for each object. Turn on lookups and matching, location and phone standardisation, and note or event options as needed.
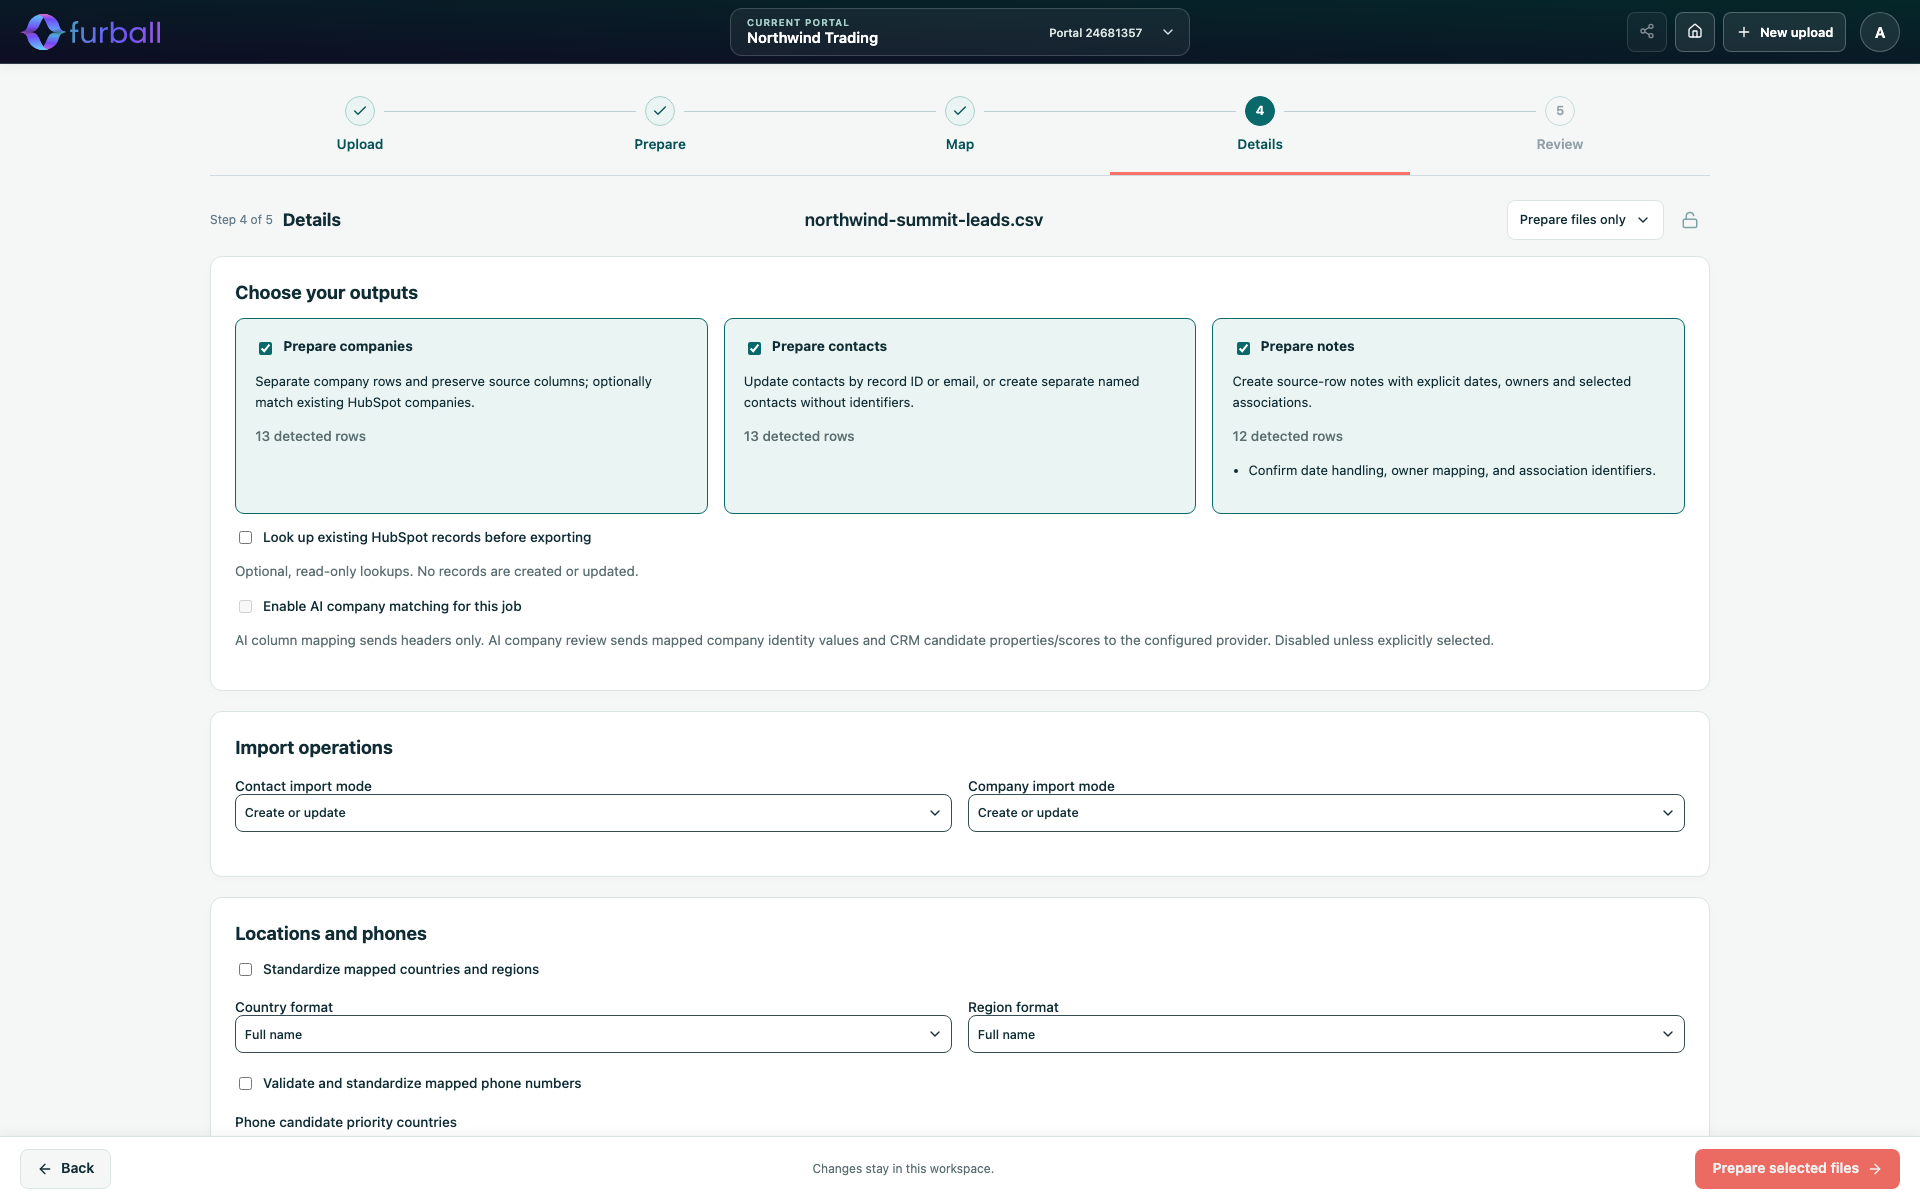
See Choose Outputs, Import Modes and Record Identifiers and Match Incoming Records to Existing HubSpot Records.
Step 6: Review the results
In Review, prepare the files and work through the validation messages. Correct individual rows, choose a different match where needed, or skip rows that should not be imported. Choose Apply changes & rerun after making changes.
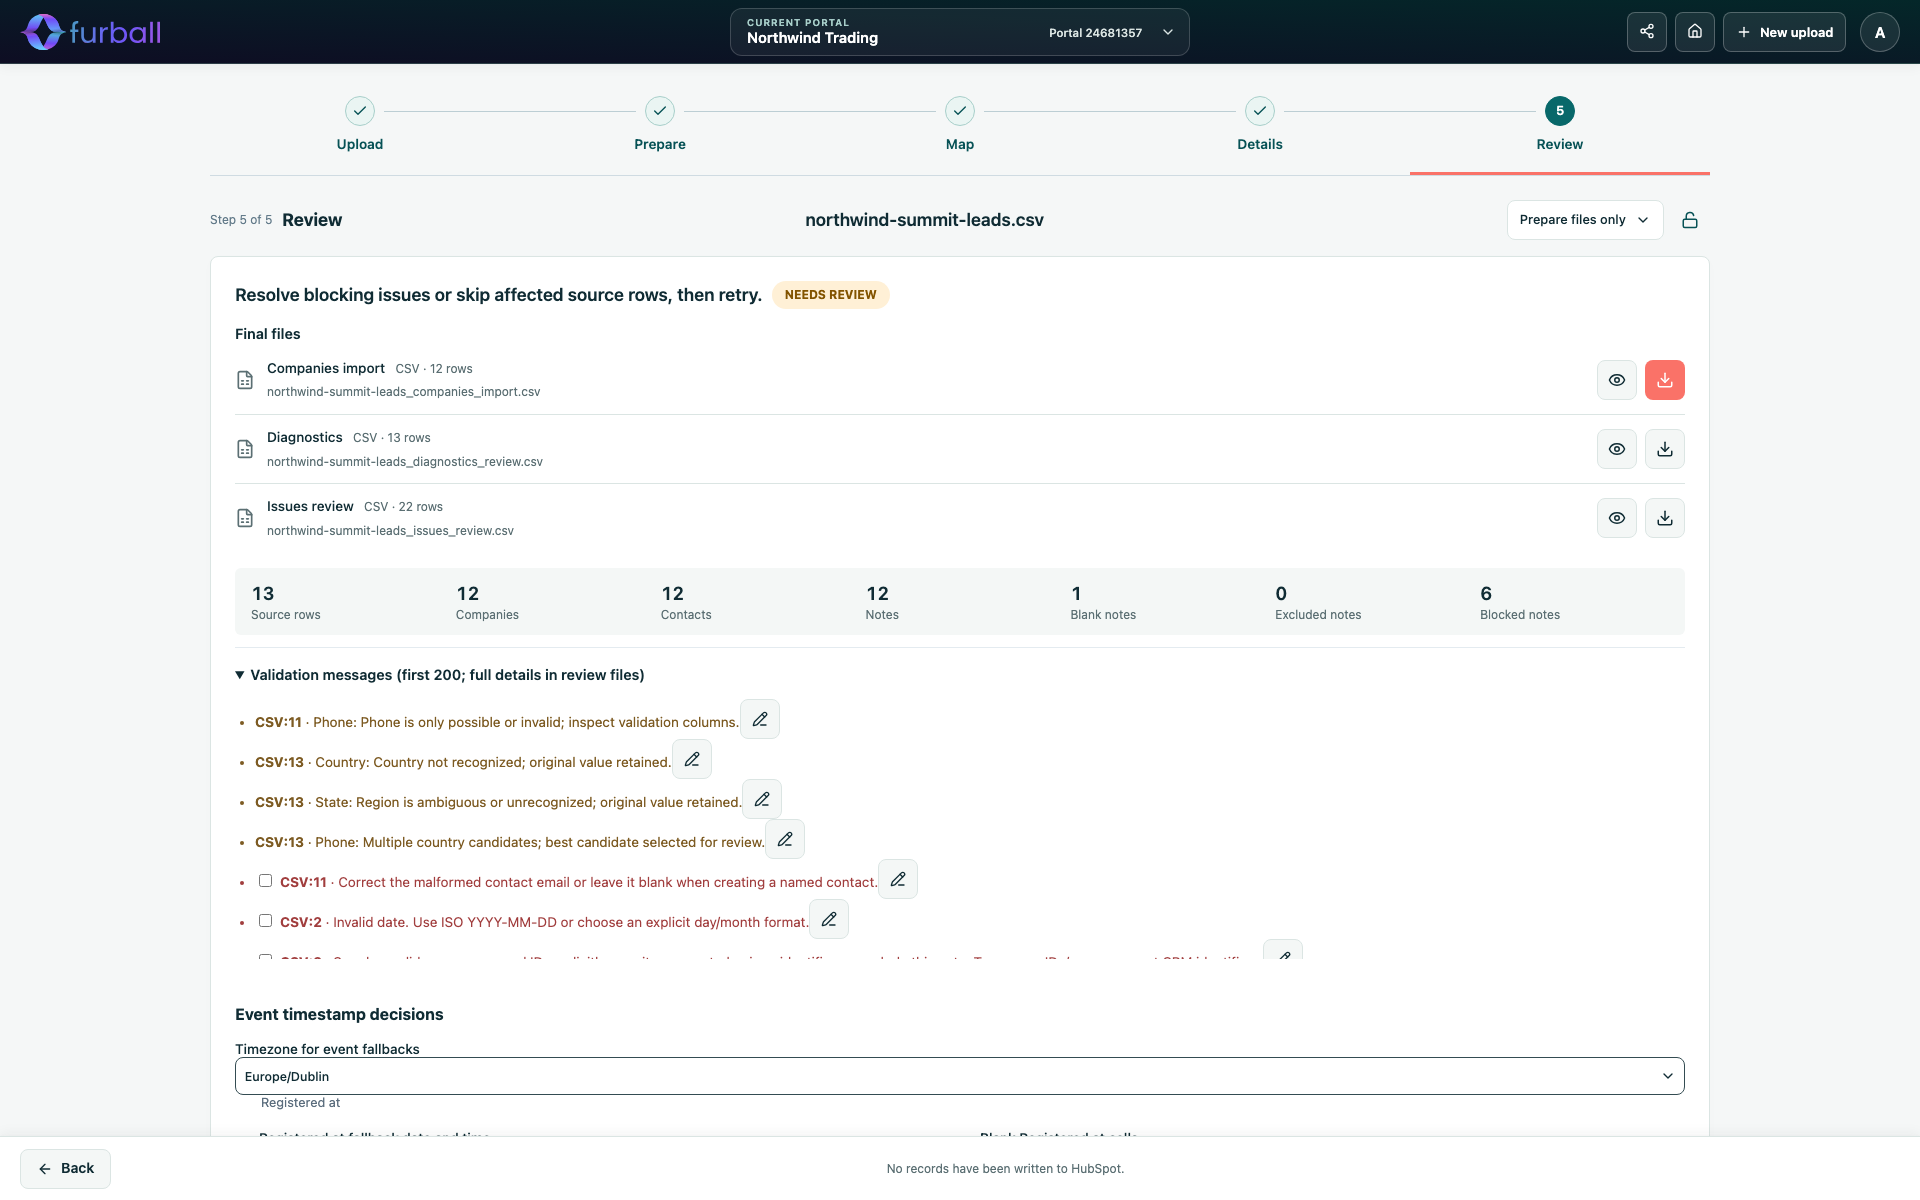
See Review Results and Correct Source Rows.
Step 7: Deliver the data
- With Prepare files only, download the import files and the import instructions, then use HubSpot's import tool. See Download Prepared Files and Import Them into HubSpot.
- With Automated ingestion, choose the records to import, review the confirmation summary, tick the confirmation and choose Confirm & import to HubSpot. See Import Directly into HubSpot with Automated Ingestion.
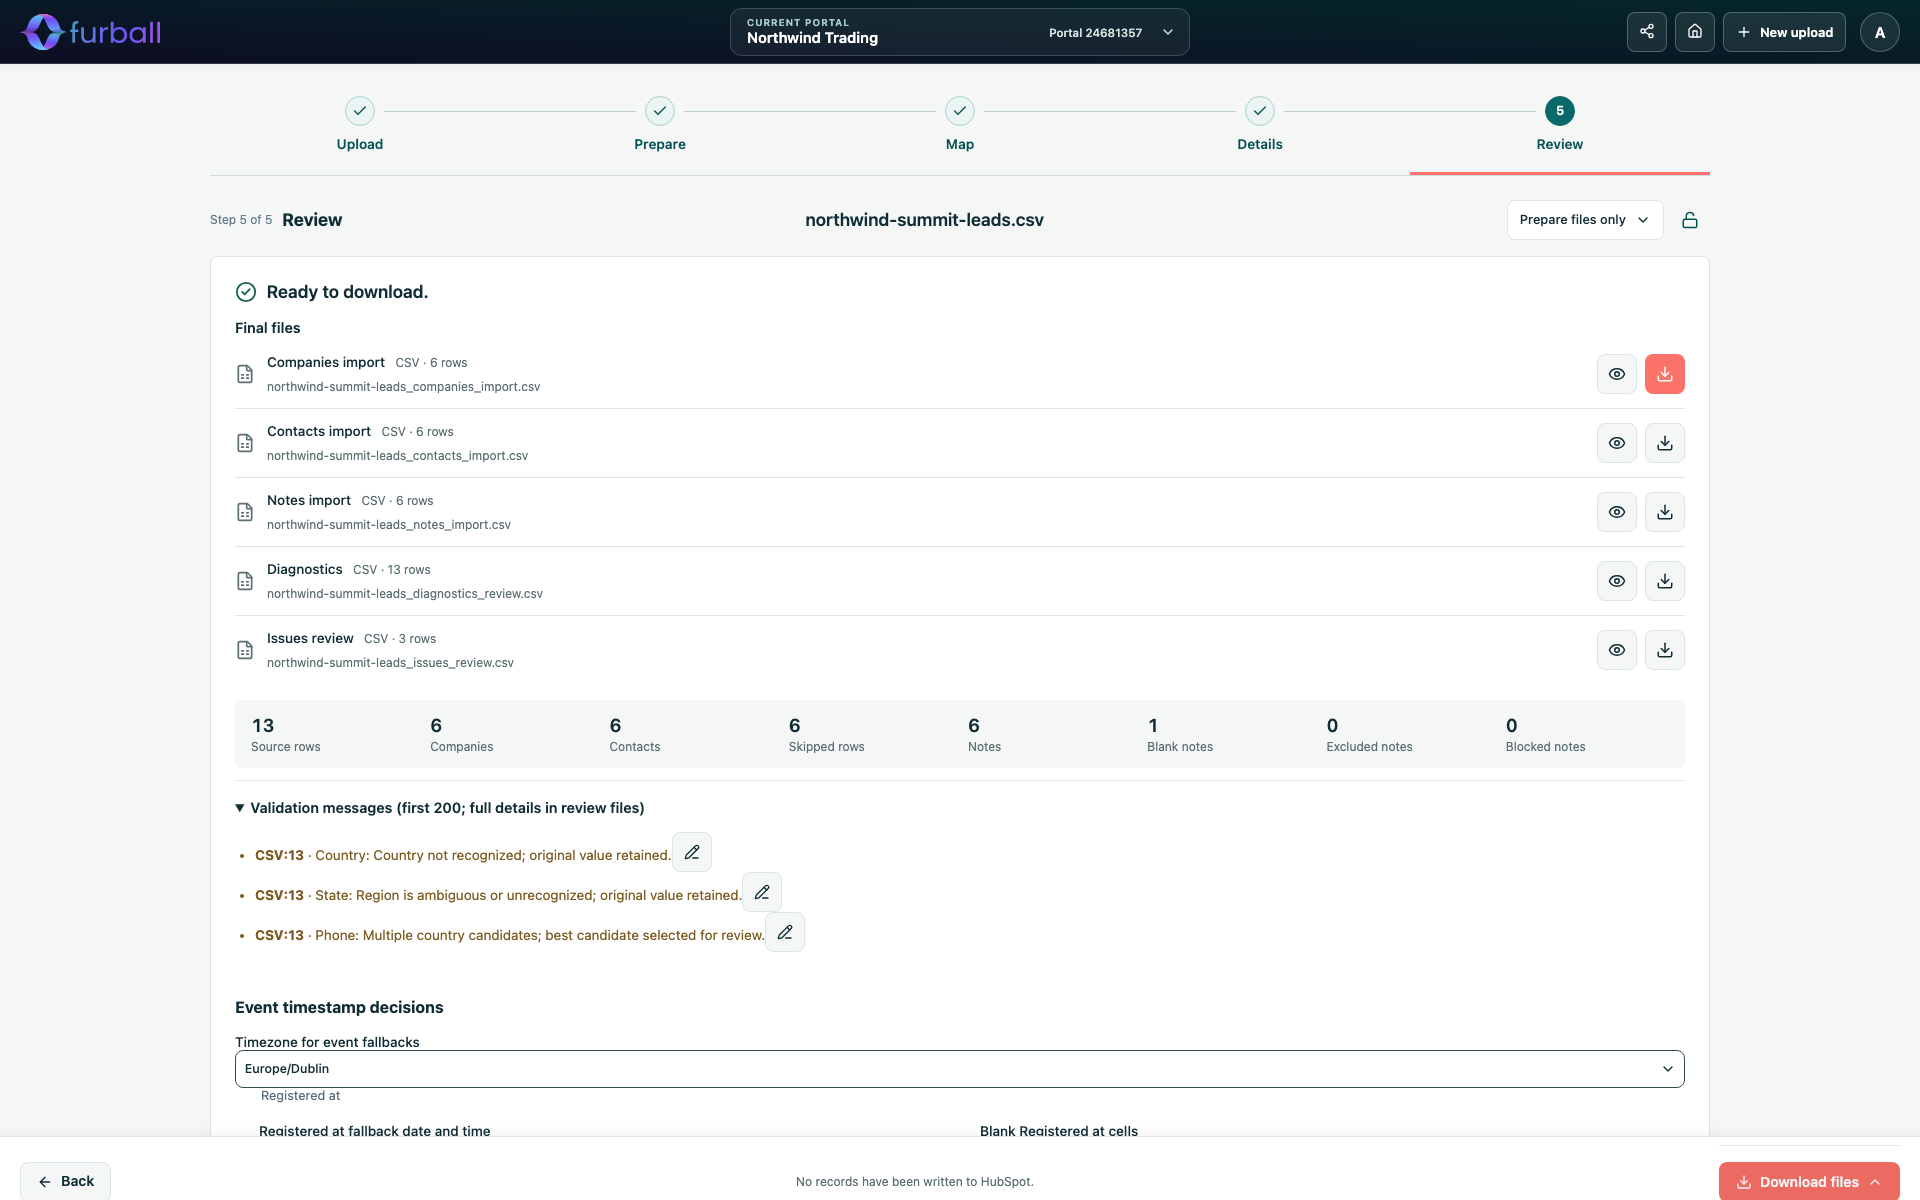
Preparing files never imports CRM records by itself. Creating a HubSpot property or dropdown option is a separate action with its own confirmation.
After the import
- Open a sample of new and updated records in HubSpot and check their properties, owners and associations.
- Confirm that notes, event participation and segments look as intended.
- Keep the import in history so colleagues can see what was prepared and when.
What to do next
- Read How Data Ingestion Studio Works to understand defaults, reruns and what changes HubSpot.
- Use Data Ingestion Studio Best Practices as a checklist for future imports.